Hand Embroidery: How to Stitch Step-by-Step
Learn how to stitch hand embroidery and start your new project with our step-by-step stitch guide.

Medium weight fabrics including Cotton plain weave, calico, and cotton canvas, as well as linen, linen twill, and linen blend fabrics are popular selections.

Crewel, tapestry,
chenille, milliner, darning, sharps, and quilting needles
are popular choices
and are selected
based stitch and fabric.

Embroidery thread/floss
is used. Separated and grouped by stands, the number of strands used is
based on pattern design and stitch.
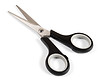
Many options for
scissors are available
from rounded tip crafting scissors to precise pointed tip
scissors.

Embroidery hoops hold the fabric securely for consistent stitching.
Often available in wood or plastic hoops can range in shape and size.

Used to transfer or draw the design onto your fabric, a pen with ink that will disappear is essential to ensure that your fabric looks clean once your stitching is completed.

Printed with the design to be stitched, soluble paper can add stability to your fabric while making project prep quick and easy.
The items listed above are just some staple embroidery tools and supplies.
Additional supplies and accessories include threaders, magnifiers, lamps, stands, needle minders,
stretcher bars, project bags, organisers, speciality papers for transferring designs to fabric, and more.
STARTING YOUR THREAD

STEP 1
Start by holding the thread end
at the back of the fabric
leaving enough thread to hold
securely.
STEP 2
Begin stitching remembering
to work over the thread end
on the back of the fabric.
ENDING YOUR THREAD

STEP 1
End the thread
by running the needle under the
worked stitches on the back
of the fabric.
STEP 2
Carefully trim thread
ensuring not to cut worked
stitches.
BACKSTITCH

STEP 1
Starting at A,
take the thread up through A
and down through B.
STEP 2
Take thread up through C
and down through B.
STEP 3
Take thread up through D
and down through C.
Repeat to continue stitch.
SPLIT STITCH

STEP 1
Starting at A,
take the thread up through A
and down through B.
STEP 2
Take thread up through C
in the middle of the first stitch
to split the thread.
Repeat to continue stitch.
SATIN STITCH

STEP 1
Starting at A,
take the thread up through A
and down through B.
STEP 2
Take thread up through C
and down through D.
Repeat to continue stitch.
TIP
To make a clean edge
for the satin stitches,
first stitch an outline of split stitch.
Then work the satin stitches
on the outside of the split stitches.
STRAIGHT STITCH

STEP 1
Starting at A,
take the thread up through A.
STEP 2
Take thread down through B.
Repeat to continue stitch.
LONG AND SHORT
FILLING STITCH

STEP 1
Starting in the center of the shape,
take the thread up through A
and down through B.
to make a straight stitch.
STEP 2
Continue making straight stitches
at varying lengths side by side
as you would satin stitch
as shown as C and D.
The direction of stitches can be
angled and overlap to fill a shape
and create a shaded effect.
TIP
To make a clean edge
for the satin stitches,
first stitch an outline of split stitch.
Then work the satin stitches
on the outside of the split stitches.
STEM STITCH

STEP 1
Starting at A,
take the thread up through A
and down through B.
STEP 2
Halfway between A and B,
Take thread up through C,
and down through D.
STEP 3
Take thread up through B,
and down through E.
Repeat step 3 to continue stitch.
RUNNING STITCH

STEP 1
Leaving an equal space between each stitch,
start at A taking the thread up through A
and down through B.
STEP 2
Take thread up through C
and down through D.
STEP 3
Take thread up through E
and down through F.
Repeat ensuring to keep
even spacing between stitches.
LACED RUNNING STITCH

STEP 1
Start with a line of running stitch.
To begin the lace effect,
take the thread up through A,
the same hole as the first running stitch.
STEP 2
Weave the thread under each
running stitch as shown above
maintaining even thread tension.
Repeat to the end of stitches.
STEP 3
To end, take the thread
down through the hole of the last
running stitch as shown as B.
COUCHING

STEP 1
Starting at A with needle 1,
take the thread up through A
and lay thread along the fabric.
STEP 2
Taking thread in needle 2,
take the thread up through B
and down through C
to secure thread in needle 1
to the fabric.
STEP 3
Continuing with needle 2,
repeat step 2 with even spacing
as shown in D to G as desired.
OVERCAST STITCH

STEP 1
Start with a line of stitches.
or split stitch can be worked.
Straight stitch, back stitch,
STEP 2
Starting at A,
take the thread up through A
and down through B.
STEP 3
Continue making straight stitches
side by side as you would make
satin stitch as shown above.
Repeat to the end of stitches.
SEED STITCH

STEP 1
Starting at A,
take the thread up through A
and down through B
making a short straight stitch.
STEP 2
Continue making short straight
stitches in varying directions
and sizes to fill the area
with as many stitches as desired.
FREN STITCH

STEP 1
Starting at A,
take the thread up through A
and down through B.
The length of this stitch will
determine the length of all
other stitches.
STEP 2
Take thread up through C
and down through B.
STEP 3
Take thread up through D
and down through B.
Taking the thread up through E,
repeat steps 1 to 3
to continue stitch pattern.
LAZY DAISY

STEP 1
Starting at A,
take the thread up through A
and make a loop shape with
the thread.
STEP 2
Going back through
the same hole in the fabric as A,
take the thread down through B.
STEP 3
Take the thread up through C
and down through D
to secure the loop to the fabric.
FISHBONE

STEP 1
Starting at the top centre
of the shape,
take the thread up through A
and down through B
to make a straight stitch.
STEP 2
Continue making straight stitches
taking the thread of all up stitches
from the shape line,
and making all down stitches
slightly overlap the center line.
Continue alternating left and right
of the center line to fill the shape
creating a feather effect.
FLY STITCH

STEP 1
Starting at A,
take the thread up through A.
STEP 2
Making a loop with the thread,
take the thread down through B.
STEP 3
Take the thread up through C
and down through D
to secure the loop to the fabric.
FRENCH KNOT

STEP 1
Starting at A,
take the thread up through A
and wrap the thread around
the needle twice.
STEP 2
Take thread down through B
and pull thread gently down
through the fabric to create
a neat knot shown as C.
CHAIN STITCH

STEP 1
Starting at A,
take the thread up through A
and make a loop shape with
the thread.
STEP 2
Going back through
the same hole in the fabric as A,
take the thread down through B.
STEP 3
Take the thread up through C
making a loop as in step 1
and take the thread down through D
as in step 2.
STEP 4
Continue in step 3 as desired,
then to end pattern
take the thread up through E
and down through F
to secure the loop to the fabric.
Discover our collection of embroidery, cross stitch, and needlepoint
fabrics, threads, notions, and more.